What is the safest way to install bathroom downlights? The answer begins with planning, not drilling. A bathroom combines moisture, metal fittings, confined spaces, and mains electricity. One careless connection can turn a stylish ceiling into a serious hazard.
The IET Wiring Regulations, BS 7671, classifies bathrooms as special locations. Its requirements address protective zones, supplementary bonding, RCD protection, and suitable equipment selection. IEC 60529 also provides the IP-rating framework used to assess protection against water and solid particles. These standards matter because a downlight above a shower faces very different exposure from one near a dry ceiling.
The National Fire Protection Association’s Home Structure Fires research repeatedly identifies electrical distribution and lighting equipment among important sources of residential fire ignition. Electrical Safety First’s consumer guidance also warns that bathroom electrical work requires competent, qualified professionals. The message is simple. Do not guess.
Darren Staniforth, a technical standards expert associated with NICEIC, has expressed the practical principle this way: “A bathroom must be treated as a special location, not an ordinary room.” That advice should guide every decision, from circuit isolation to final testing.
A safe installation normally includes correct zone assessment, an appropriate IP rating, RCD protection, secure cable routing, adequate ventilation, and inspection by a qualified electrician. The exact rating still depends on location and exposure. IP44 is not automatically suitable everywhere.
A neat fitting proves very little. Hidden heat, loose terminals, or water entry may remain unseen. This guide examines ten safer installation practices, while acknowledging an uncomfortable truth: even careful planning can fail without competent testing and local code compliance.
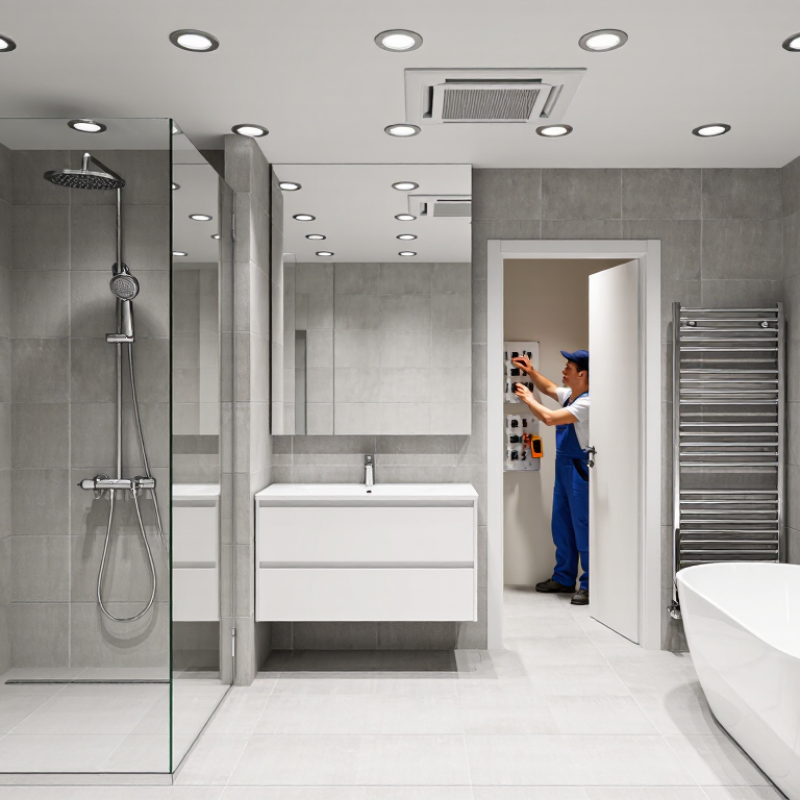
Top 10 Safest Ways to Install Bathroom Downlights
Choose downlights according to the bathroom safety zone, not appearance alone. Zone 0 is inside a bath or shower basin and usually requires IPX7 protection. Zone 1 covers areas directly above wet zones, where IPX4 protection is commonly required. Zone 2 extends beyond these areas and may still need moisture-resistant fittings. Local electrical rules can differ, so confirm the exact zone measurements before purchasing.
A qualified electrician should check the circuit, earthing, isolation switch, and RCD or GFCI protection. Use sealed downlights with suitable heat ratings and keep wiring away from water paths. Never place a fitting where a shower spray can reach it unless its rating allows that exposure. A neat ceiling does not guarantee a safe installation. Condensation can enter weak seals quietly. I have seen this overlooked.
Tips: Mark the zones on the ceiling first. Read the complete product rating, not just “bathroom suitable.” Check the IP code, voltage, mounting depth, and insulation compatibility. Use approved connectors inside accessible enclosures. Test the protective device after installation. Leave clearance around insulation when required. Photograph the completed wiring for future maintenance. If the ceiling is damp, investigate the moisture source before fitting lights. Rechecking measurements may feel slow, but guessing here is a poor trade.
| Rank | Safety Practice | Bathroom Zone or Condition | Technical Checkpoint | Verification Before Use |
|---|---|---|---|---|
| 1 | Select the correct IP-rated downlight for the installation zone | Zone 0 Inside a bath or shower basin |
Use equipment with at least IPX7 protection against temporary immersion. Only products specifically approved for this location should be considered. | Confirm the complete product marking and installation instructions, not just the appearance of the fitting. |
| 2 | Use a higher splash-protection rating near showers and baths | Zones 1 and 2 Areas exposed to water spray |
Use at least IPX4 for water-splash protection. Where water jets may occur, local rules may require IPX5 or higher. | Check the IP code on the luminaire and compare it with the applicable electrical code for the room. |
| 3 | Keep the downlight outside the defined shower and bath zones where practical | Outside zones Ceiling areas away from direct spray |
A lower-risk location does not remove the need for suitable moisture resistance. Use a bathroom-suitable fitting when condensation or splashing is possible. | Measure the location from the bath or shower and follow the zone dimensions required by local regulations. |
| 4 | Install a 30 mA residual-current protective device | All bathroom circuits Subject to local electrical rules |
Use a 30 mA RCD or RCBO where required by the applicable code. This provides additional protection against electric shock but does not replace correct installation. | Have the device tested with its test button and verified with suitable electrical test equipment by a qualified person. |
| 5 | Use low-voltage equipment only when the complete system is suitable for the zone | Especially Zone 0 Wet locations with increased shock risk |
Where SELV is required or selected, use a compatible safety isolating transformer or driver located in an allowed dry position. The driver, wiring, connectors and luminaire must all be suitable. | Confirm the system voltage, separation requirements, enclosure rating and maximum cable length in the manufacturer’s instructions. |
| 6 | Choose a fully enclosed, bathroom-suitable downlight | Zones 1 and 2 Humid or splash-prone ceilings |
Use a fitting with a sealed front, suitable gasket and an IP rating maintained after installation. Do not rely on an open lamp holder or an unsealed ceiling cut-out. | Inspect the seal, bezel, spring clips and ceiling surface for gaps, distortion or damage. |
| 7 | Protect the fitting from insulation and overheating | Any ceiling installation Particularly insulated ceilings |
Use an insulation-contact-rated fitting, or maintain the exact clearance specified by the manufacturer. Never cover a non-IC-rated fitting with thermal insulation. | Check the thermal classification and clearance diagram before fitting insulation around the light. |
| 8 | Use suitable wiring, connectors and junction enclosures | All zones Above ceilings and inside voids |
Use wiring and accessories rated for the temperature, moisture exposure and voltage. Connections must be enclosed, strain-relieved and accessible where local rules require access. | Check cable condition, terminal tightness, enclosure integrity and compatibility with the light’s driver. |
| 9 | Provide safe switching and isolation for maintenance | All bathroom circuits Before cleaning or replacement |
Install an appropriate means of isolation and keep switches or control equipment in locations permitted by local regulations. Do not place ordinary switches where they can be reached from a bath or shower if prohibited. | Confirm that the circuit can be isolated, locked or clearly identified before maintenance begins. |
| 10 | Have the work inspected and tested by a qualified electrician | Every zone New installations and alterations |
Required checks commonly include protective conductor continuity, insulation resistance, polarity, RCD operation and verification of the IP and zone requirements. | Obtain the appropriate inspection, test results and compliance documentation required in the installation’s jurisdiction. |
| Safety note: Bathroom zones, IP requirements, RCD rules and permitted equipment can vary by country and installation standard. The zone references above follow commonly used IEC 60364-7-701 principles; always follow the current local electrical code and the downlight manufacturer’s instructions. Electrical installation and testing should be completed by a qualified professional. | ||||
No. Isolate the circuit at the consumer unit.
A qualified electrician should use a suitable two-pole voltage tester.
Mark each light position with a pencil.
Follow the fitting’s cut-out template and required clearances.
Choose lighting suitable for the bathroom’s moisture exposure and installation location.
They can identify shared circuits, hidden junctions, earthing problems, and unsuitable protective devices.
Stop using it if you notice flickering, unusual warmth, staining, or a burning smell.
Schedule checks after ceiling work, water leaks, or noticeable performance changes.
Installing bathroom downlights safely starts with choosing fittings designed for the correct bathroom safety zones and rated for moisture, water exposure, and heat. Before any work begins, plan the lighting layout carefully, check ceiling access, confirm circuit capacity, and ensure all electrical requirements are understood. The safest approach is to isolate the power completely and verify that the circuit is dead before preparing precise ceiling openings and mounting points.
What is the safest way to install bathroom downlights? Use suitable damp- or wet-location fittings, maintain required clearances from water sources, and follow the product instructions and local electrical requirements. Each light should be securely mounted, properly sealed against moisture, and connected with suitable wiring and protective components. After installation, restore power only when all covers and connections are secure. Test the circuit, switches, and lights, and check for flickering, heat, moisture entry, or loose fittings. When electrical work is complex or uncertain, a qualified electrician should complete or inspect the installation to support long-term safety.

 Pina Light