2026 Top Tips to Reduce Glare from Deep Recessed Downlights?

Time:2026-09-27 Author:Liam
0%

Deep recessed downlights can create a sharp, uncomfortable brightness contrast, even when their light source sits several centimetres above the ceiling. This guide explores How to reduce glare from deep recessed downlights through optical design, installation checks, and measured lighting performance. The issue is not simply “too much light.” A dark ceiling, polished floor, or exposed LED chip can make a modest fixture feel harsh.

Professional guidance supports a measurement-led approach. CIE 117:1995 introduced the Unified Glare Rating method, while EN 12464-1:2021 sets glare and illuminance recommendations for many indoor workspaces. The Illuminating Engineering Society also stresses visual comfort, source shielding, and appropriate distribution in its lighting practice documents. These references remind designers to examine the entire visual field, not only the lamp’s wattage. A 40-degree beam may look controlled on a drawing, yet glare can remain visible from a nearby sofa or workstation.

Real projects often reveal the missing detail. A black baffle, adequate cut-off angle, and frosted lens can soften the bright point above eye level. Dimming helps, but it cannot correct a poorly aimed fixture. Clean ceilings and pale walls may also increase reflected brightness. However, this is where judgment matters: UGR calculations do not perfectly represent every residential room or decorative installation. Human experience still matters. The following 2026 tips combine standards, manufacturer photometry, site observation, and practical corrections for more comfortable recessed lighting. Mistakes happen. Good lighting design leaves room to test, adjust, and question the first solution.
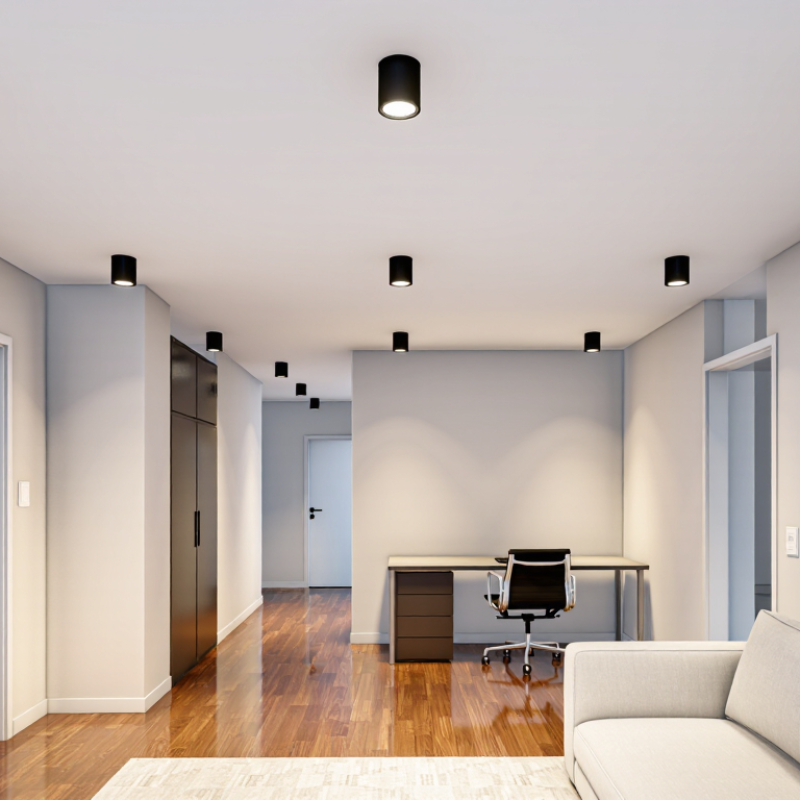
2026 Top Tips to Reduce Glare from Deep Recessed Downlights?

Assess the Causes of Glare in Deep Recessed Downlights

Deep recessed downlights can still cause glare when their bright LED source enters a viewer’s line of sight. The recess hides the lamp from some angles, not every angle. A narrow beam can also create a bright patch on a desk or wall beside a dim ceiling. That contrast makes the source feel harsher. Glossy screens, pale surfaces, and closely spaced fixtures may add reflections or overlapping pools of light.

The CIE 117:1995 method calculates Unified Glare Rating (UGR) using factors such as source luminance, apparent size, position, and background luminance. EN 12464-1:2021 gives UGR limits by visual task; 19 is a common limit for office work. These are assessment tools, not guarantees of comfort in every room. Still, they help pinpoint whether the problem is excessive brightness, poor aiming, or fixture layout. A quick check from seated eye level often reveals what a ceiling plan misses.

Tips: View the lights from normal seating positions, including near screens. Check whether the LED is visible below the trim. Compare beam angles and spacing, then test a lower-output lamp or deeper shielding. Do not dim blindly; uneven pools can remain. I would also inspect the wall and desk finishes. This diagnosis is imperfect—people notice glare differently, and one adjustment may expose another bright spot.

Choose Beam Angles, Trims, and Baffles for Better Visual Comfort

Deep recessed downlights can conceal the lamp, but a bright lens may still catch your eye from a sofa or hallway. Comfort depends on what you see, not just how far the light sits above the ceiling. Walk through the room at night and note where the source appears in your normal sightlines. Small test. A sample fitting can reveal problems that a floor plan misses.

Beam angle shapes the light on the room. Narrow beams create concentrated pools and can make the contrast with surrounding surfaces feel harsher; wider beams spread light, but may illuminate unwanted areas. Check the fixture’s photometric data and test spacing on the actual ceiling height. CIE 117:1995’s Unified Glare Rating method considers source luminance, apparent size, position, and background luminance—not beam angle alone. A useful reference, not a home rule: EN 12464-1:2021 sets a UGR limit of 19 for many office tasks.

Choose a deep regressed trim or a matte baffle that blocks the bright source from common viewing angles. Dark baffles can reduce the visible brightness, though they may also absorb some light. That trade-off is easy to overlook. Compare the lit ceiling and work surface, not just the fixture’s appearance in a catalogue. If glare persists, adjust placement or dimming; a decorative trim cannot fix every optic.

2026 Top Tips to Reduce Glare from Deep Recessed Downlights? — Choose Beam Angles, Trims, and Baffles for Better Visual Comfort
Design Factor Practical Guidance Typical Starting Point Visual Comfort Benefit What to Check
Beam angle Choose a beam wide enough to illuminate the task without creating an unnecessarily bright, concentrated source. Use narrower beams for accents and wider beams for general illumination. About 36°–60° for many general-lighting layouts; approximately 15°–30° for focused accent lighting. Can reduce harsh bright spots and uneven contrast when matched to mounting height, spacing, and target area. Confirm the beam spread and spacing using the luminaire’s photometric data; beam-angle definitions can vary by manufacturer.
Recessed depth Use a deep-regressed optic so the light source sits farther above the ceiling plane and is less directly visible from common viewing angles. Select the deepest practical regression that fits the ceiling void and required light output. Limits direct view of the bright LED or reflector, especially when occupants are seated or looking across a room. Check the cut-out, housing depth, driver space, thermal requirements, and whether the source remains hidden at the intended viewing angles.
Trim and aperture Prefer a narrow, matte-finished aperture or a regressed trim when the fixture is visible from seating areas or circulation paths. Use a low-reflectance finish; choose aperture size according to the optical system and ceiling design. Reduces reflections from the trim and makes the bright opening less visually prominent. A smaller opening is not automatically more comfortable; verify light distribution and avoid excessive loss of useful illumination.
Baffle design Consider dark, ridged baffles to absorb stray light and reduce reflections inside the recess. Use a black or other low-reflectance baffle for glare-sensitive locations. Can make the aperture appear darker and help control reflected light reaching the viewer. Check that the baffle is compatible with the optic and does not obstruct required light output or maintenance access.
Shielding angle Choose optics with adequate shielding so the source is concealed from typical lines of sight. Compare the manufacturer’s shielding angle or glare-related photometric information for the actual installation. Reduces the likelihood of seeing the bright source directly when approaching or sitting near the fixture. Assess sightlines from beds, desks, sofas, counters, and circulation routes—not only from directly beneath the downlight.
Light output and dimming Use only the light level needed for the task, and provide compatible dimming where appropriate. Set output from measured or calculated illuminance rather than selecting the highest available lumen package by default. Lowering excessive luminance can improve comfort while preserving adequate task visibility. Verify dimmer compatibility, flicker performance, minimum dimming level, and applicable lighting requirements.
Color temperature Select a consistent color temperature suited to the room and its visual tasks. Common interior options include 2700 K–3000 K for warmer spaces and 3500 K–4000 K for a more neutral appearance. Does not remove glare on its own, but can support a comfortable and visually coherent lighting scheme. Consider color consistency, color rendering, finishes, daylight, and the intended atmosphere.
Layout and aiming Place downlights to illuminate surfaces and tasks rather than directing bright beams into occupants’ eyes or onto reflective screens. Plan spacing and aiming from room dimensions, ceiling height, beam spread, and task locations. Reduces direct glare and distracting reflections while improving uniformity. Review plans and mock-ups from real seated and standing positions; avoid relying on spacing rules alone.

Position Downlights to Limit Direct and Reflected Brightness

Deep recessed downlights can still feel harsh when their bright apertures sit inside a normal line of sight. Position them slightly behind standing or seated eye lines, rather than directly above a sofa or kitchen stool. Aim adjustable beams at work surfaces, not toward glossy counters, glass doors, or pale walls that can bounce light back into the room. A dark ceiling helps less than expected when the beam lands on a reflective surface.

Use the Unified Glare Rating as a useful check, not a complete answer. CIE 117:1995 sets out the UGR method, which considers luminaire luminance, apparent size, position, and background brightness. EN 12464-1:2021 gives UGR 19 as a limit for many office tasks; it is not a universal residential target. Reflected glare needs a separate visual check. I still find this easy to misjudge from a plan alone.

Mock up one fitting before setting the full layout. Sit at the dining table, then stand by the counter and look across the room. Move the fitting away from the reflected image in a screen or polished worktop. Test after dark. Small shifts matter. Deep trims can hide the lamp from one angle, yet expose it from another. Record the viewing positions and surface finishes; otherwise, the final spacing may look tidy on paper but uncomfortable at night.

Balance Light Levels with Dimmers, Layers, and Color Temperature

Deep recessed downlights can feel harsh when their beams hit a pale countertop or polished floor. A dimmer helps, but lowering every fixture is not always the answer. In a kitchen, try reducing the ceiling lights while keeping a pendant or under-cabinet light at a comfortable level. This preserves visibility without turning the room into a bright, flat space. Check the result while standing and sitting; glare changes with your viewing angle.

Layered lighting gives each task its own support. Use recessed fixtures for general light, then add focused task lighting near sinks, desks, or reading chairs. Aim beams away from glossy surfaces and keep the brightest light out of direct eye lines. Small adjustments matter. If shadows become distracting, raise the dimmer slightly or reposition the task light. I have found that one setting rarely works for every activity, and that is easy to overlook.

Color temperature also affects comfort. Warm white light can feel gentler in a living room, while a more neutral white may help with detailed kitchen tasks. Choose a consistent tone within connected areas where possible, then test it at night before settling on a setting. Dimming can sometimes make a room feel too amber or dull, depending on the lamp and control. There is no perfect number; compare the actual light on your walls, work surfaces, and eyes.

Test, Adjust, and Maintain the Lighting System for Long-Term Glare Control

For deep recessed downlights, glare control should be tested from the places people actually sit, stand, and work. View each fitting from a sofa, doorway, and kitchen counter; a lamp that looks comfortable directly below may shine into someone’s eyes across the room. Dim the lights and check again. Brightness, beam angle, and dark surroundings can change the impression.

Use a light meter to record illuminance at the task surface, then compare readings after adjustments. The CIE’s UGR method, published in CIE 117, provides a standardized way to assess discomfort glare. EN 12464-1 sets a UGR limit of 19 for many office tasks, but that value is a reference point, not a universal residential pass mark. For practical checks, note the viewing position and dimmer setting; otherwise, comparisons can mislead. Small differences in seating position matter more than I expected.

Recheck the installation after changing lamps, trims, or furniture. Dust on a recessed baffle can create uneven brightness, so clean it gently and inspect for loose or damaged parts. If glare persists, try a lower-output setting or a deeper, matte-black baffle, then repeat the same viewing test. Keep a simple log with dates, settings, and observations. It will not be perfect, but it makes gradual changes easier to spot.

2026 Top Tips to Reduce Glare from Deep Recessed Downlights

Test, adjust, and maintain the lighting system to keep average Unified Glare Rating (UGR) under control. Lower UGR values indicate better visual comfort; UGR ≤ 19 is commonly used as a target for office-style visual tasks.

The representative test sequence shows how increasing shielding, correcting aiming, cleaning optical surfaces, and replacing damaged components can progressively reduce glare. Recheck readings after maintenance because dust, misalignment, and aging can raise glare over time.

FAQS

Why can deep recessed downlights still cause glare?

The recess hides the light source from some angles, but not every sightline. A bright LED may still be visible from a sofa or desk.

What room details can make glare feel worse?

Glossy screens, pale walls, and closely spaced lights can add reflections or overlapping bright patches. A narrow beam may also leave the ceiling looking dim.

How should I check for glare in a room?

View the lights from a sofa, doorway, and work surface, especially near screens. Check whether the LED is visible below the trim. Small test.

How do beam angles affect visual comfort?

Narrow beams create concentrated pools of light and stronger contrast. Wider beams spread light, but may illuminate areas you did not intend.

Can a trim or baffle reduce glare?

A deep regressed trim or matte baffle can block the source from common viewing angles. Dark baffles may reduce visible brightness, but can absorb some light too.

What do UGR assessments tell me?

The CIE 117 method considers source luminance, apparent size, position, and background luminance. It can help identify likely glare sources, but comfort varies between people.

Is a UGR limit of 19 right for every room?

No. EN 12464-1 uses 19 as a limit for many office tasks. It is a reference, not a universal residential pass mark.

How can I compare lighting adjustments fairly?

Record the viewing position, dimmer setting, and task-surface readings. Repeat the same check after each change; otherwise, comparisons can mislead.

What should I do if glare returns later?

Recheck after changing lamps, trims, or furniture. Clean dusty baffles gently, inspect for damage, and test a lower-output setting if needed. A simple log helps, though it will not explain everything.

Conclusion

Glare from deep recessed downlights can result from excessive brightness, an unsuitable beam angle, poor positioning, or light reflecting off glossy surfaces. How to reduce glare from deep recessed downlights starts with identifying these causes, then selecting beam angles and trims that direct light comfortably. Recessed baffles and suitable diffusers can help shield the light source from direct view while preserving useful illumination.

Plan fixture locations to avoid shining into people’s eyes or creating harsh reflections, and balance downlights with ambient and task lighting. Dimmers allow light levels to be adjusted for different activities, while a consistent, comfortable color temperature can support a more pleasant atmosphere. After installation, test the lighting from typical seating and walking positions, make adjustments as needed, and keep fixtures clean and in good condition to maintain visual comfort over time.

Liam

Liam

Liam is a dedicated marketing professional with a profound expertise in the industry, where he excels at highlighting the unique advantages of our core products. With a keen understanding of market trends and consumer needs, Liam frequently updates our company’s professional blog, providing......